
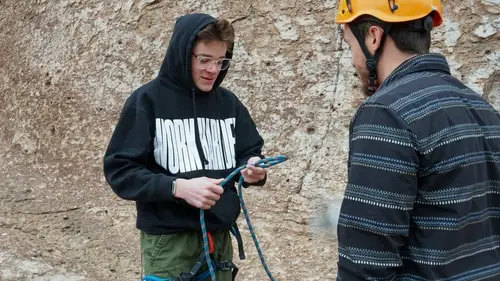
One of the most intimidating parts of rock climbing is the ropework and knots. A competent outdoor sport climber needs to know a handful of knots in order to be prepared for every situation, but an indoor gym climber really just needs to know one.
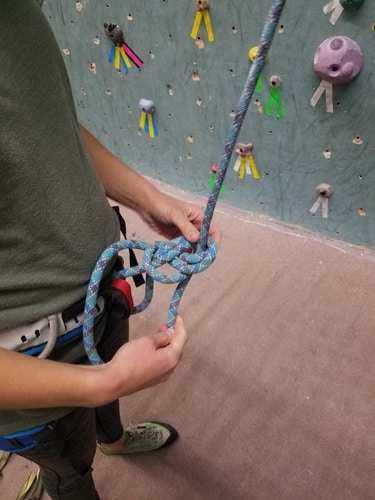
Rock climbers use a figure eight follow through to tie themselves into the sharp end of the rope. The climber ties the figure eight a few feet from the end of the rope, loops it through the bottom and top loop of the harness, and then retraces it. The tail should be at least 6 inches long.
The Figure 8 Follow Through is a simple knot to tie, and can be useful to tie a strong loop in pretty much any type of rope or cord. It’s the main knot we use for climbing and is tried and true for safety. The following are some tips for tying it and how to avoid common mistakes.
The Figure Eight Follow-Through Knot
A knot is usually the weakest point on a rope (unless the rope is otherwise compromised). During tests where manufacturers repeatedly drop heavy weights secured by ropes or slowly suspend more weight from a rope, the knot is usually the place that breaks. The Figure Eight Follow Through is great for climbing because the knot still maintains 70-80% of the strength of the rope.
Steps for Tying a Figure 8 Follow Through Knot for Rock Climbing
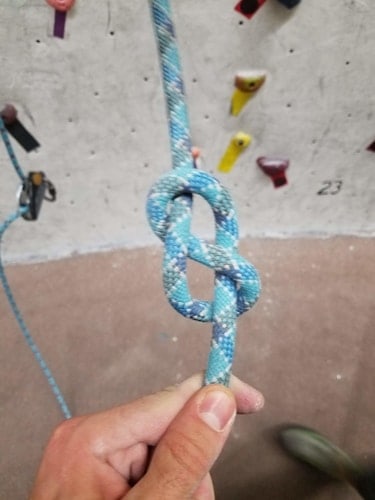
- Tie the initial 8 in the rope 2-3 feet from the end by creating a loop and twisting it an extra time. Thread the end of the rope through the loop you created and confirm that it makes an “8” shape.
- Thread the rope through the point on the bottom of your harness and up through the point on the top of your harness.
- Retrace the 8 from the bottom up until it comes out the top.
- Ensure the tail is 4-8 inches long. Tie a stopper knot in the end if it is too long, or feed slack from the bottom if it is too short.
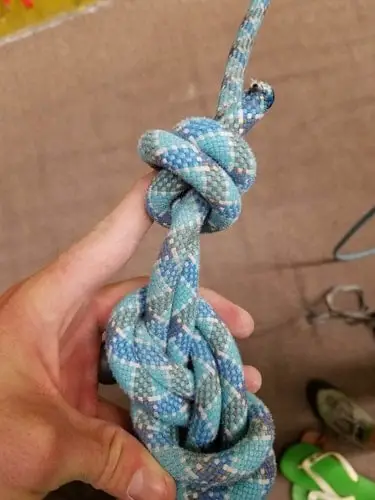
- Pull on both ends to ‘dress’ the knot so that it tightens neatly. Confirm there are 2 strands of rope at each point of the 8.
- Have a partner check your knot before climbing.
Is a Stopper Knot on the Tail Necessary?
Many climbing gyms require climbers to tie a stopper knot (strangle knot, often called a barrel knot, fisherman’s knot, or double overhand knot) on the tail. The reason for this is to make sure that your knot isn’t too short. According to the American Mountaineering Guide’s Association (AMGA ), it’s preferable not to use the stopper knot because it can be confusing for some climbers.
The stopper knot is not necessary, but you should still know how to do it if your gym requires it. It’s not a bad thing, but doesn’t contribute any additional safety. The important thing is to make sure the tail is long enough.
Common Mistakes With a Figure 8 Follow Through

Climber forgets to untie the 8 after untying from the rope at the bottom of a climb. It’s going to happen to you at some point. Maybe you think someone else is going to climb after you so you leave the skeleton 8 in the rope.
You or someone else starts to pull the rope, and it gets stuck in the anchor at the top. It’s going to happen to you at some point in your climbing career, so hopefully it happens somewhere you can hike around to the top and untie it!
Failing to “dress” the 8 after retracing it. I see this all the time with climbers in the gym. You thread the rope through your harness and back through the 8, finishing with a nice stopper knot on the end and start climbing.
The problem is that if you don’t take a second to tighten the knot down, falling can tighten it up on one section instead of evenly through the knot. The knot’s strength comes from its uniformity.
Tying the 8 through just your belay loop or through only the top or bottom point. Your belay loop just isn’t made to take lead falls. The rope needs to go through 2 points on your harness (climbing is all about redundancy!).
Thread it through the bottom loop and up through the top before retracing the 8. If you only go through one point, then you could flip upside down during a bad fall. Some gym harnesses only have one reinforced tie-in point, which is an exception.
Connecting to the rope with a carabiner instead of straight into your harness. It can seem like you’ll save a lot of time if you tie the figure 8 onto a carabiner instead of straight into your harness so other climbers can just clip right in. The problem is that a carabiner doesn’t have the same strength requirements as a harness.
The rope can easily shift around the carabiner while you’re climbing and get cross-loaded. This is a dangerous condition where the forces on the carabiner are applied against the gate instead of along the axis, which could cause it to fail.
Not leaving a long enough tail on the 8. If you fall (when you fall), the rope will tighten significantly. This can shorten the tail of the rope and pull it hard enough that it undoes a portion of the 8, which reduces its strength. Make sure you have at least a fist’s width of tail coming out of the top of the 8.
Leaving too long of a tail on the 8. Too long of a tail can also be an issue, as it gets in the way and can get snagged on stuff. You could even accidentally clip it into a draw instead of the live rope. Secure the end with a stopper knot or retie it so it is less than 8 inches long.
Leaving too big of a loop between your harness and the 8. The 8 is the pivot point of any fall you take, so you want it close to your harness. Additionally, you could accidentally clip into the loop instead of the live rope, which would make you look stupid when you have to downclimb and try again.
Forgetting to double check your knot. Always check your knot and have your belayer confirm it. The majority of climbing accidents seem to happen when people make mistakes, not when gear fails or rocks fall. Just because you’ve done it a thousand times doesn’t mean you won’t slip up once.
Other Names for the Figure Eight Follow Through
While this is the most common name for the knot, there are several others you may hear it called. These include: re-threaded figure 8, rewoven figure 8, figure 8 loop, figure 8 on a bight, Flemish loop, and Flemish 8. They’re all basically the same knot, so don’t get confused.
Other Uses for A Figure 8 Follow Through
The Figure 8 Follow Through can come in handy in other places than just tying into a harness. If you tie the knot without tying it around anything (i.e. your harness loops), then it is a figure 8 on a bight. This can be useful for carrying loads and connecting to carabiners.
You can use a single figure 8 (not followed through) as a stopper knot in the end of a rope to keep you from rappelling or falling off the end, but a double overhand knot is usually more secure.
Related Questions:
How To Dress a Figure 8 Knot? Dress a figure 8 follow through knot by pulling on all four of the strands that go into and out of the knot. Line up the 8 so that there are no twists and it sits smoothly. There should be two strands of rope at each point.
Do I Need a Stopper Knot on My Figure 8? A stopper knot is just to ensure that the tail is long enough. If the tail of the rope is longer than 4 inches, you do not need one. A stopper knot can help keep the tail out of the way if it is too long.
See Also:
How to Lengthen the Life of Your Climbing Shoes