Rappelling is dangerous- most climbing and canyoneering accidents happen on the rappel. There isn’t a lot of room for error when you are 100 feet up a cliff. It’s worth it to always take the necessary steps to decrease risks and add extra security to your rappels. Better safe a thousand times than dead once! Set up a backup and get into the habit now of checking, double checking, and then having a friend triple checking the set up.
To backup a rappel you need to tie a friction knot like a Prusik to catch you if you let go of the rope. This is often referred to as a “Third Hand.” Additionally, you should also use a fireman’s belay at the bottom to slow you down in case you lose control. Backing up a rappel can be a bit of a hassle, but once you are used to it it becomes second-nature.
To backup a rappel you need to remember one key word- redundancy. The whole system should be created with redundancy. What is redundancy is rappelling? It means having a backup plan. Rappellers and climbers are famously known for having a backup plan to a backup plan to a backup plan. When you backup your rappels , you give yourself a safety net in case anything does happen.

How Often do You Need to Backup a Rappel?
To be conservative, the answer is always. But, it is most important to use a backup when beginners are rappelling, when the rope is slippery and wet, hands are cold, or when you are not sure how tough the rappel will be. If you back up the rappel by tying a friction knot or fireman belay, mistakes won’t lead to a fall.
Friction Knots
Friction knots are used in multiple ways: in rappelling as a safety back up, in climbing to ascend ropes, or in other emergency belay situations. The hitch will catch you if you fall by holding the brake rope, should the climber accidentally lose control or let go of the rope while moving. On the other hand, the Fireman’s Belay doesn’t require any extra rope or knots; however, you do need another person at the bottom of the cliff in order to execute.
There are 4 basic friction knots used in rappelling. Every climber and rappeller needs to know at least one of these knots.
- Autoblock Knot AKA French Prusik
- Prusik Knot
- Klemheist Knot
- Bachmann Knot
This post will describe each of these 4 types of friction knots and the fireman’s belay, as well as discuss the pros and cons of each. Then we added some tips for how to remember to double-check everything and stay safe rappelling.
Read our post on the most common rappelling accidents and how to prevent them for more safety tips.
Autoblock Hitch Backup
An Autoblock Hitch is a common friction knot. Friction knots use a thinner cord tied around the rappel rope as a safety-back up. It will lock under a load if needed, but it can also move while still under a load. It slides down the rope as you rappel. If you stop, it cinches and tightens onto the rappel rope. This helps you to descend a rappel slowly and maintain control, especially on tough rappels with rocky obstacles you have to maneuver around or on overhangs.
How to tie the Autoblock knot:
- First you need an extra cord about 6-7mm thick cut to about 42 inches long. It is better to use a cord, but using about 2 feet of webbing will also work. It needs to be long enough to give slack, but not too long to get caught in the rappel device.

- Connect the ends of the cord into a loop with a fisherman’s knot leaving very short tails.
- Wrap the autoblock cord 4 or 5 times around the rappel rope. More times wrapped= more friction on the rope= slower rappel. With too many wraps the knot won’t slide easily, but with not enough it will slip on the rope. Test the amount of wraps around the rope when you are done by leaning back and weighting the rope to make sure it slides fairly easily but doesn’t slip.
- Attach the cord to the leg loop of your harness with a carabiner. Put the carabiner through the leg loop. Make sure the ends aren’t too long that they will get stuck in your rappel device.
To Rappel:
Finally you are ready to rappel feeling satisfied that you have a safe backup tied. Now, weight the rope, put your braking hand just below the autoblock knot holding the rappel ropes. You can put your guide hand/upper hand on top of the knot, or above your rappel device
 . Let the knot slide as your hand keeps it loose with your descent. If you want to stop, let go of the knot and it will cinch on the rope
 . Anytime you release the autoblock hitch, you will have a hands free brake in your descent.
You can also use 2 hands below your rappel device – one hand on the autoblock hitch and the other to control the rope
 speed. Typically it’s best to place the right hand (braking hand) lower on the autoblock hitch and the left upper hand to control the rope speed.
Advantages- The autoblock is easy and fast to tie. The rappel rope heat is absorbed by the cord so you don’t get rope burn. The climber can safely stop mid-rappel as the knot adds friction to the rope.
Disadvantages- The ends of the cord can get stuck in the rappel device if you don’t pay attention
Prusik Hitch Knot
This is the most commonly used friction knot. You can place this above or below your belay device .
.
 How to tie the Prusik knot:
- Start with about 5 feet of cord about 5-6mm wide. Tie the ends together with a fisherman’s knot.
- Take the loop of the cord and place it perpendicularly behind the main rappel rope
- Take one side of the loop of cord behind the rappel rope, bring half of the loop through the other half of the loop. This forms a girth hitch which is a basic knot for attaching any objects to a cord
- Next, bring the loop back through the girth hitch 2-3 more times by wrapping the loop of cord through the inside of each previous wrap
- When finished, tighten the knot and carefully arrange all the loops of cord so it is neat and not crossed. The more times you wrap the cord around the rope, the Prusik knot will cinch tighter onto the rappel rope. Test the knot by weighting it. If it slips, add another wrap, if it is too hard to push the rappel rope through the knot, take away a wrap. Leave it a bit loose.


Advantages- A Prusik knot is easy and quick to tie, it is also very secure with a loaded rope.
Disadvantages- the Prusik knot can grip the rope so tightly and be difficult to release after it tightens to be able to slide the rope through. The autoblock is often a better choice
Klemheist Knot
The Klemheist Knot is similar to the Prusik knot.
How to tie the Klemheist knot:
- Again, start with a piece of cord formed into a complete loop.
- Pull the loop around the main rappelling rope. Make about 3 wraps around the main rope, lining them up neatly.
- Pass the rest of the cord through the leftover loop. Then pull the cord back down in the direction of the load to tighten it.
Slide the knot along the rope as you descend.
Advantages- The Klemheist knot grips well and also slides easily on a rope. It is easier than a Prusik knot to loosen and slide along the rope when weighted. This knot is also faster to tie with cord or webbing and easier to undo. It can also be used in situations to ascend a rope.
Bachmann Knot
The Bachmann Knot is very similar to the others except a carabiner is used as a handle to move along the rappelling rope. The carabiner is used for friction, which is released when the load is released from the hitch so it can slide freely. Make sure to use a locking carabiner since you’ll be holding it to move the hitch.
How to tie the Bachmann knot:
- Start with a loop of cord and clip the loop into a carabiner.
- Hold the carabiner next to the vertical rappel rope and wrap the loop around the rappel rope about 3 times, passing it through the carabiner each time.
- Pull on the end of the loop to tighten the knot.
- Use the end of the loop to attach it to your harness with a carabiner.
With your hand around the carabiner as a handle, slide the knot along the rope as you descend.
Advantages- The carabiner makes it simple to move the knot along the rope. It releases when it’s not loaded, but automatically grips the rope when it is weighted.
Disadvantages- The carabiner doesn’t grip the rope as well.

Fireman’s Belay
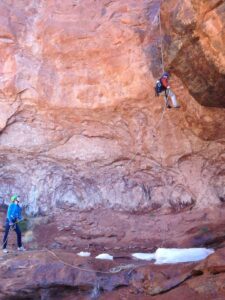
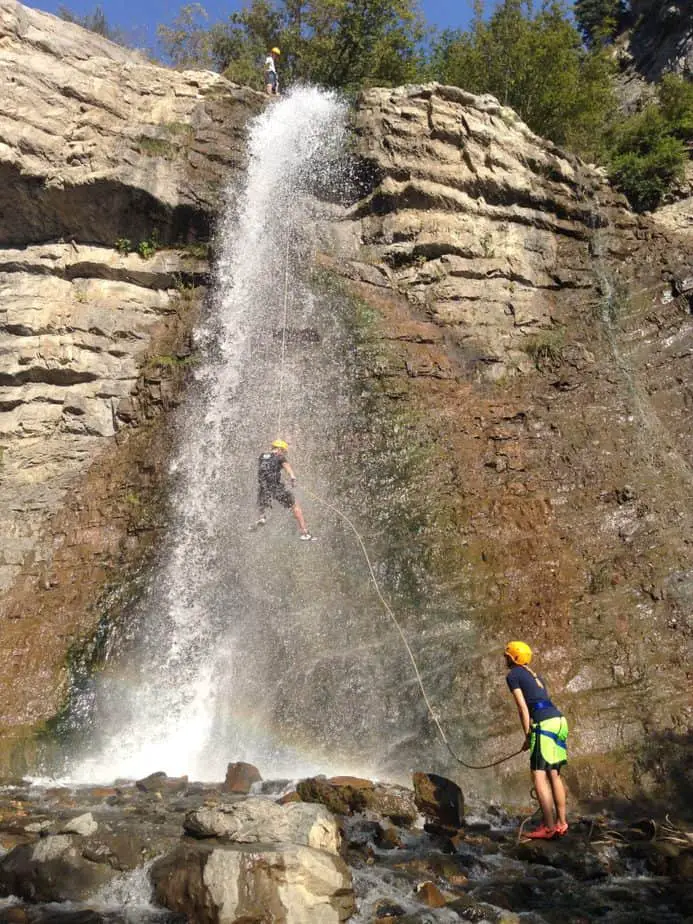
The most simple rappel backup is a Fireman’s Belay. It requires no extra rope or equipment, and no additional knots. How do you do the fireman’s belay? Have your partner at the bottom of the rappel hold the rappel rope loosely in his or her hands. Should you start to slip or let go, they can pull the rope so your descent is stopped or slowed. This is a lot simpler and faster than tying a friction knot, and with good communication between you and your partner, can be more effective.
Advantages- Requires no extra gear, so nothing can get tangled in the belay device. Very easy for anyone to do with a little coaching
Disadvantages- Requires an additional person, and that person must be at the bottom. For this reason, it doesn’t work in canyons where there is no way around. The first person rappelling would not be able to have a fireman’s belay
Stopper knots
Another type of backup you can do is to make sure that you tie a knot at the end of your rappel ropes, called stopper knots. This ensures that you won’t rappel off the ends of your rope in case your rope isn’t long enough, you can’t see the bottom of the rappel, or you lose control at the end. This is such a simple tactic, yet often overlooked.
Many rappelling accidents happen when someone rappels of the end of their rope. This can happen if rappel ropes just aren’t quite long enough and the rappeller is going fast and doesn’t notice the ends of the rope quickly sliding through their belay device. Next they fall 20 feet or so and wake up later in the hospital. (P.s. always wear a helmet to stay safe.) This problem is easy to fix. Please confirm the length of the rope you need before any rappelling trips and while setting up, check that the ends of the rappel rope reach the ground or the next belay station BEFORE you start your rappel.
How to Tie a Knot at the End of your Rappel Ropes to Close the System:
Use a triple barrel knot and tie one at the end of the rope you are rappelling on. It is an easy knot that won’t slip through a rappel device. Remember, you have to think about this at the beginning because you have to tie the knots BEFORE you throw the rope over the ledge.
There are a few variations because you may worry that the end of your rope will get stuck when it is heavier and bulkier with a knot. You can also tie the ends of the rope together and clip them to a gear loop in your harness . This is called a “saddle bag” and you pull the rope coils as you rap.
Tips to Stay Safer Rappelling:
BRAKES Acronym
Redundancy is key, but you need to make sure your whole rappel system is safe. Here’s a way to remember to double check yourself before you begin to rappel. A common acronym is “BRAKES.” This is a good way to help you remember to double and triple check every aspect of your rappelling system before you descend.
B- Buckles. Before you begin your rappel, put on your harness and make sure the buckles are snug and correctly fitted. With some harnesses, you have to double back through with the straps.
R– Rappel Device and Ropes. Make sure that the rope has been loaded correctly into your rappel device and that your locking carabiner is correctly closed. Now check again.
A- Anchor. Use a strong anchor and test your weight against it before descending. Make sure that any trees and boulders are big enough, heavy enough, and will not move. Check that trees are alive, sturdy, and will hold your weight easily.
K- Knots. Go through and carefully check every knot in your rappelling system. Check the anchors, any knots joining 2 ropes for a double-rope rappel, your rappel device set up, etc.
E- Ends. Confirm that the ends of your rappel rope reach the ground or the next belay station. Close your system with knots at the end of the rappel ropes so that you won’t rappel off the ends.
S- Safety Backup and Sharp Edges. Have a safety backup that will catch you in case you let go or get knocked unconscious while rappelling such as an autoblock knot. Also make sure that the rope won’t rub on any sharp edges.
Conclusion
Be Careful! Be prepared, be redundant, and triple check everything. Do not get complacent even if you’ve rappelled the route a hundred times before.
Overall, learning at least one friction knot will help you safely back up your rappels. It takes a little extra time to put it together, but it is easy to use and could save your life in an emergency.
Has a rappel backup ever saved you from a fall? Let us know below-
See Also:
Top 10 Most Common Rappelling Accidents- How to Stay Safe Rappelling


