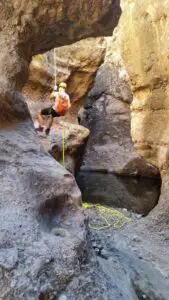
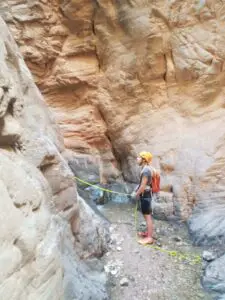
Starting to get interested in climbing or rappelling? Well there’s a lot of gear and equipment you will need to learn about. This post is going to cover one of the most basic pieces of equipment, the rappel device. This post will walk you through what a rappel device is, how to use one, and some of the most common types of belay and rappel devices. Keep reading to learn how to use a rappel device when rappelling.
What is a Rappel Device?
Rappel devices (also known as Belay Devices ) are mechanical brake devices that control the speed of a rope when rappelling (or abseiling). They allow you to descend a rope by sliding down it. The rope, harness, and rappel device protect the rappeler against a fall. A rappel device is one of the most important pieces of rappelling gear. It connects the rappeler to the rope with the harness and controls how fast the rappeler wants to go.
How to use a Rappel Device:
The rope travels through the rappel device which acts as a brake by adding friction to the rope and protecting the rappeler. Practice feeling comfortable using your rappel device before you rappel. Here are some basics to using a rappel device and the different types of gear available.
Starting your rappel
Double-check that your harness is secure and that both rope ends are on the ground (when rappelling both strands of the rope). With the rope going into your rappel device and then to your harness- don’t forget to lock your carabiner- put your hands into the ready position.
 Place the guide hand on the rope above the belay device and then keep your brake hand, your dominant hand, on the rope below the belay device down by your hip. Call out “on belay” to ensure the belayer is ready with the rope in case you fall.
Position
The best way to describe your body position is to “sit back” while harnessed into the rope. Your legs will be out in front of you with your hips at 90 degrees pushing against the wall. When ready to start your descent, plant your feet on the edge of the cliff ledge, and lower yourself down by sitting back with your butt until your legs are at 90 degrees to your body pushing against the cliff. Keep your back straight and move your legs down the cliff one at a time while you feed the rope through.
How To Descend and Control Your Speed with a Rappel Device
Your top hand is your guide hand above your rappel device, lightly grip the rope and just let it slide through your fingers as you descend. This hand also keeps you upright and steady. The lower hand, the brake hand, will keep you safe- keep your brake hand constantly on the rope to manage the speed of your descent down the cliff. In the stopped position, keep your brake hand straight down, parallel to your body holding the rope.
To begin lowering, raise your brake hand to the side slightly and let the rope slide through your hand. Control your rappel in this way. To increase your descent, smoothly move your braking hand up at an angle to your body until you feel the rope is moving at a good speed you can still control. Never let go with your brake hand and all rappels will be safe and smooth.
How To Slow Down or Stop with a Rappel Device
If you are going too fast and want to slow down or stop your descent, put friction on the rope with the rappel device by pulling the rope with your braking hand straight down to your hip (or crossed behind your butt), parallel to your body. It is recommended to wear leather gloves at least on your braking hand, especially if doing multiple rappels.

Belay
In most cases, you will execute what is called a Fireman’s Belay. The belayer at the bottom of the rappel holds the strand(s) of rope loosely in his or her hands and watches the rappeler descend the rope. Should the rappeler fall or slip, the belayer needs only pull on the rope and the rappeler stops completely. A Fireman’s Belay requires no gear. The belayer should watch out for falling rocks or gear!
To Finish
When you get to the ground and are steady, simply unclip the rope from your locking carabiner and slip it out of your rappel device. Then once you are disconnected from the rope, make sure you yell “off rappel” so anyone coming after you will know you are off the rope and it is safe to come down.
Types of Rappel Devices:
The different types of rappel devices will affect how fast you can rappel. Read on for a quick guide to different types of rappel devices. These double as belay devices- the same devices that are used for belaying rock climbers. They can be used for both belaying and rappelling. Other mechanical belay devices are more suitable for belaying than rappelling, including assisted braking devices.
 ATC-
ATC-
- Description: The name comes from Black Diamond naming their equipment the “Air Traffic Controller” to help you control your landing. The name is used to refer to any tubular rappel device with a “tube” or rectangular shape. Many ATCs have dual slots so one or both sides of the rope can thread through the dual slots on the ATC and clip to the harness with a locking carabiner. Double rope rappelling runs the same as single rope rappelling, but with more friction. Use ATC’s for slower, very controlled descents. ATCs are the most common type of rappel device used today because they can be used for both climbing and rappelling.
- Pros- ATCs are easy to use and can be used for rappelling on both strands of rope to create a very controlled descent. Works for belaying and rappelling.
- Cons- ATCs can be slow for rappelling. Lightweight rappellers especially may have a harder time and find themselves almost “feeding” the rope through as they descend. ATCs generally cost a little more than the most simple devices, but not much.
8 Ring or Figure 8-
- Description: A figure 8 shape with one large and one small aluminum ring. There are 2 different ways to connect the rope to the 8 ring. Feed a bend of the rope through the large hole and loop it up around the neck of the small loop, then connect the 8 ring through the locking carabiner on your harness.
- Pros: 8 rings are simple to use. They put less friction on the rope, leading to fast- but still controlled- descents. Any diameter of rope fits on the device, and it slides easily through the 8 ring during the rappel. An 8 ring works just fine with stiff rope, but may wear a rope more quickly than other rappel devices (especially when wet and sandy). An 8 ring is the most affordable belay device and is very common.
- Cons- More force is required from the belayer’s braking hand. Sometimes a figure 8 is known to twist the rope. If you hold the brake hand off to the side it can cause the rope to twist, but holding the brake hand straight down allows a controlled descent without the rope twisting.
Opinion:
- My personal favorite rappel device is the figure 8 because I can choose to go fast or slow depending on whether I thread the rope around the neck of the eight ring or not. You can go a lot faster while still feeling in control compared to an ATC or rappel ring. We used Figure 8 rings on a trip to southern Utah in February on a wet, sandy canyoneering trip with 4 different rappels. Our rope got wet and a little sandy and we were surprised that the friction of the rope with wet sand carved deep grooves into our figure 8 rings by the end of the day! We definitely retired those.
- Thrill seekers- feed a bend of the rope through the large hole and pull it through. Skip wrapping it around the small neck and just clip the small neck and the rope loop through your locking carabiner. This will make the descent a lot faster with less friction. If you want to push your feet against the cliff and jump out while lowering yourself quickly, try this.
Rappel Rack-
- Description: A U-shaped frame with multiple bars across. The rappel rope is woven through multiple bars to provide varying levels of friction, then the U shaped frame is attached to the rappeler’s harness.
- Pros: Variations of rope diameter and rope conditions can be used with a rappel rack. A rappel rack also will provide a controlled descent. It is good for longer rappels to adjust the friction by adding/removing bars as you go.
- Cons: More difficult to use and can be slower.
Rappel Ring (Rap Ring)-
- Description: a continuous metal loop a few inches wide (tip: do not use non-continuous welded rings). These are typically used as an alternative method of rappelling. Take a bend of the rope through the hole and snap both through the carabiner on your harness.
- Pros: Very basic, and simple.
- Cons: Does not put much friction on the rope and may seem a little harder to control.
Carabiner-
- We do not recommend just using a single carabiner to rappel, but if you drop your belay device, you can do it. The best way to rappel in this emergency is using 4 carabiners (you should always carry a few extra) to make a double carabiner brake. If you only have one carabiner you can also tie a munter hitch on your locking carabiner.
The type of rappel device you use depends on your personal preference and how comfortable you feel with rappelling. Spend money on the good safe ones, and check them before each use! Have fun rappelling!
Learn the ropes!
See Also:
Can you Rappel with a Belay Device?

