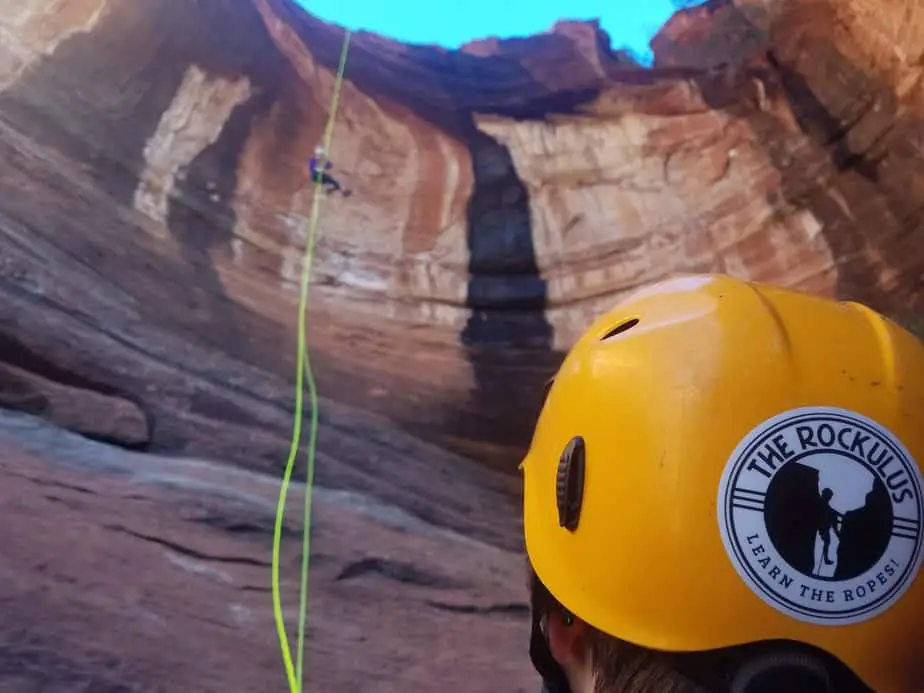
Canyoneering, or Canyoning elsewhere in the world, has grown significantly over the past few decades. New canyons are discovered and explored every year! A lot of these tips are things that I picked up from other canyoneers, but some of them are my own ideas. Whether you are a novice canyoneer or a seasoned explorer, these tips and ‘hacks’ will help make canyoneering better
1. Rope Management Hack
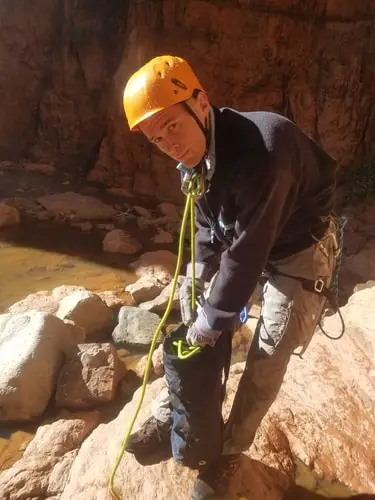
Keeping a rope organized and clean can be really frustrating. Most people either try to coil it up like a climbing rope or stuff it. I find that stuffing it works better and keeps it not as stiff while also keeping it from getting unintentionally tied in knots. Stuffing a rope after every single rappel is really annoying though, so here’s a better way to do it that I learned from some friends.
Clip your rope bag to a carabiner on your harness, and clip another carabiner to either the chin strap on your helmet or chest strap on your backpack. Thread the end of the rope through the carabiner on your chin strap and then just stuff the rope into the bag hand over hand.
It works best if you pull the rope first so that the carabiner works like a pulley. It saves a ton of time and energy! Some people just keep a small non-climbing carabiner on their helmets at all times that they use for this, but a locker works too.
2. Get it on Camera
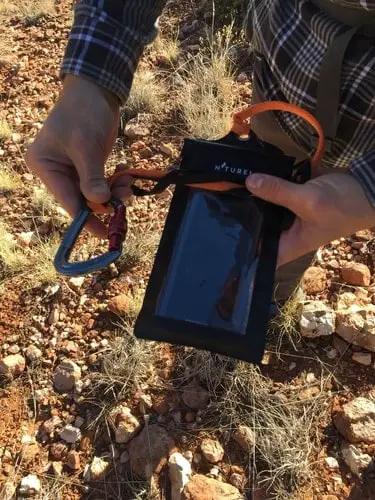
Use your cell phone for pictures, keeping it safe in a waterproof phone case. Get one with a durable lanyard (or do what I did and use durable cord) and secure it to your backpack with a locking carabiner. For wet canyons, pick up a camera floaty in case you drop it. At a cost of about $20, it’s a lot cheaper than the newest GoPro!
I have had a couple of different brands of waterproof case go out on me, so I recommend only doing this if your phone is at least water resistant and has a decent protective case on it. That being said, the brand I have right now has been really good though, and hasn’t leaked at all.
It’s really hard to capture the amazing scenes that you see in a canyon. Some people make the effort to haul a big dslr camera through canyons in a padded dry bag, but to me it’s too risky (and I don’t have a nice camera like that).
It’s really tedious to take off your backpack, dry off your hands, open the dry bag, and fumble around for a camera each time you see something that takes your breath away. Having it in the side pocket of your backpack and secured to your harness is the best way to do it! It makes it easy to lock off mid-rappel  for some footage, too.
To see the specific items I actually use, check out our Recommended Gear Guide – Cameras.
3. Learn How to Lock Off
It’s important to know how to lock off whatever rappel device you use. There are lots of situations where this could happen, including hair or gear getting caught in the rappel device, a knot in the static rappel rope, or some sort of obstacle down below. It’s also helpful if you want to lock off halfway down a scenic rappel to get a cool picture.
Pretty much every device can be locked off, but some are easier than others. I use the BluuGnome SQWUREL and the On Rope Canyoneering Hoodoo-SL, and both have very convenient lock off features.
It’s pretty easy to lock off with an 8 ring as well, but make sure you tie off the end of the line in case it slips. Check out my post for more information: What is the Best Rappel Device for Canyoneering?
4. Warm Feet = Happy Feet
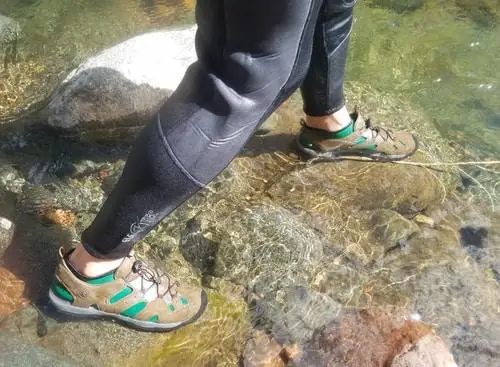
Pick up a pair of 2-5mm thick neoprene socks and wear them for class B or class C wet canyons. It’s like having a wetsuit for your feet! Neoprene socks trap a little bit of water next to your skin, keeping it insulated and (relatively) warm against your feet. You can go for short ankle socks or longer booties. The cost is between $10 and $20, and they last a pretty long time.
It only takes about two minutes of standing in freezing water for your feet to go completely numb. Since most canyon rivers come from snow melt, it’s a pretty common problem to have. 5mm socks are really thick, so you want to size up your canyoneering shoes if you decide to go with them.
I have some 3mm socks that work great, and fit nicely inside my regular shoes. I usually wear regular merino wool socks for the hike in, and then stow them in the dry bag and switch to the neoprene socks when I actually get into the water.
You can view the specific socks that I use in our Recommended Gear Guide – Shoes.
As far as wetsuits go, save your money and don’t by new! Wetsuits are necessary for most class C canyons and many class B canyons, but canyoneering is a good way to trash them. You can save a lot of money by buying them used. Your local Play it Again Sports has a wall full of wetsuits in good condition that they’ll sell you for $30, or check out apps like OfferUp or Let Go.

5. Stealth Rubber
I’ve written a lot about the importance of good shoes for canyoneering. Slippery soles, especially when standing in a waterfall on the edge of a cliff, can be extremely dangerous. You need good, solid, durable shoes with excellent grip.
Shoes with really good rubber actually print the name of the rubber on the sole so you know what you’re getting. Two of the best names out there are Stealth, by Five Ten/Adidas, and Vibram on several other big name brands.
Someone should write an ode to Stealth Rubber. I always describe it as if a lizard and a mountain goat had a baby. I’m pretty sure the soles on Spider Man’s shoes are Stealth Rubber too.
The nice thing about special rubber soles is that they stay sticky even when wet and cold. Adidas uses Stealth Rubber on their Terrex Hydro Lace shoes, which is what all of the guide companies rent out in Zion National Park.
You can see my recommendations for canyoneering shoes with good soles in this article- What are the Best Shoes for Canyoneering?
6. Thorns, Stingers, and Sharp Rocks
Everything in the desert bites. From barbed cacti to scorpions and snakes, and gritty sandstone to poison ivy, canyoneering can be very painful. Lots of routes require a significant amount of trail-finding and bushwhacking too. Do yourself a favor and cover up your arms and legs so that you don’t end up feeling like a human pincushion at the end of the day.
Read my article What to Wear Canyoneering for more information.
7. Mark the Middle of your Rope
You can save a lot of time setting up rappels if you know how much rope you have paid out. It’s also a lot safer if you’re sure that both ends of the rope touch the ground. A middle mark on your rope can really come in handy, but you pretty much only find this feature on more expensive climbing ropes.
Back in the day we used to mark the middle of our static ropes with regular sharpies. Common sense told us that was fine, but it turns out the UIAA (governing body that tests and approves climbing gear) disagrees. Black Diamond did an unofficial test however, and found that a sharpie middle mark is not where a rope will break.
BlueWater Ropes’ official statement is that you should use a water based laundry marker, and that it is safe. Some people do sew or weave a string or piece of floss into the sheath of the rope instead of coloring it.
For me, any nominal risk from marking the middle of my rope is worth the greater risk of rapping off of the end of it. In the end, it’s up to you (read my disclaimer on the sidebar!).
8. Canyoneering Backpack Modification
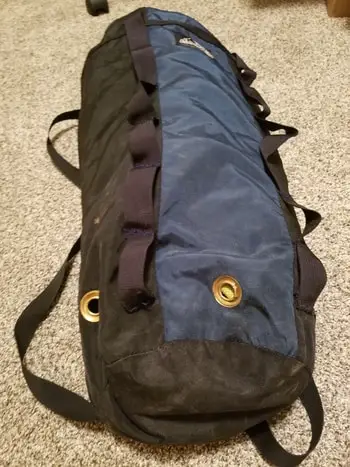
Backpacks for canyoning are awesome. They’re made out of super durable pvc, they have all kinds of exterior loops and straps for gear, and they have water permeable sides or bottoms to let water drain out after potholes or swimmers. Backpacks for canyoneering also cost as much as the rest of your gear combined.
You can take an old backpacking backpack (30-65 liters) and turn it into a canyoneering pack for under $15. For just a few dollars you can buy a grommet kit and install grommets into the bottom of your backpack to help it drain better. Then, instead of climbing out of a keeper with an extra 50 pounds of water on your back, it sprays out of the bottom. You can add as many grommets as necessary.
You can also sew a daisy chain onto a pack using buckle straps or old backpack straps. Use a heavy duty needle on a sewing machine or do it by hand. The pack won’t last forever, since it’s not made out of the same thick pvc as real canyoneering packs, but it can give a cheap backpack a lot of the same features at a fraction of the price.
Check out the Grommets I used on Amazon: General Tools Grommets
9. Better Than A Lifejacket
You can buy a really expensive big dry bag / backpack to keep all of your gear in, but you really don’t need a full dry backpack for most canyons. Instead, buy a few different smaller dry bags and pack them inside of your regular backpack. Your stuff will stay dry, and your backpack will float!
My main dry bag is a 10L, which can fit most of my emergency gear and a cell phone and keys. I also have a 5L that will just fit a cell phone and keys. It can be nice to have an even bigger one for dry clothing on a cold, wet day.
To see the bags we use, check out our Recommended Gear Page – Backpacks.
10. “It Should Hold” – Anchor Safety
A little piece of tubular webbing and a small quick link or rappel ring are all that stand between you and a long, long fall. Most of the time you won’t be setting up your own anchor, since lots of people have done it before.
It’s crucial that you know how to evaluate an anchor for safety and correct anything that could be dangerous. Alpinists use the acronym EARNEST to evaluate anchors, and it’s a good thing to keep in mind.
- Equalized– Each anchor point needs to share an equal part of the load. If it isn’t equalized then all of the weight and force are exerted on one point, which could fail. Equalizing the load divides up the force.
- Angle– The angle between the two or more anchor points needs to be less than 90 degrees (a right angle). If it is greater than this, then the forces shift and the webbing actually pulls against itself which causes irregular forces on the system.
- Redundant– Freak accidents happen, so it’s best to have at least two anchor points in case one fails. Sometimes this isn’t possible in canyoneering.
- No Extension– If one anchor point goes out, the other point needs to take the force without shock loading. Anchors are static, not dynamic, so a dynamic jerk on the rope could be dangerous.
- Solid– Each piece should be strong enough to hold you by itself. For canyoneering it’s especially important to go through and check the anchor materials that are left behind. Be aware that the elements can ruin webbing in a very short amount of time, so inspect all around it for any sun or friction damage.
- Timely– Practice rigging safe anchors at home so that you are comfortable doing it quickly in the wild- otherwise we can get lazy. Don’t get complacent and blindly trust existing anchors. When in doubt, set your own anchor.
For more information on anchors, and how to ghost a canyon, check out my article on Retrievable Rappels .
.
11. Test the Rope Pull
Before the last person rappels down, he or she should do a test pull of the rope. Part of it is an idiot check- are you tied into the correct side if rapping a single rope or did you forget to release a double block?
The other part is to watch out for potential rope traps. This could be cracks that will swallow your rope when you try to pull it or edges that will catch on a block or knot.
It’s inevitable- one day you’re going to get a rope stuck. There’s no worse feeling than standing at the bottom of a rappel and staring up helplessly at the rope stuck somewhere above. The last person needs to do a test pull of enough of the rope to see where it needs to go, and then guide the rope there as they go over the edge.
12. Gloves for Rappelling
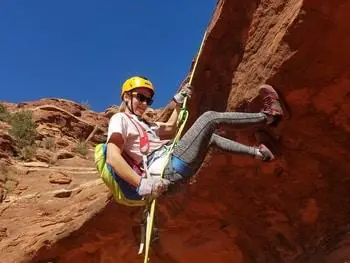
Growing up, we rappelled with 8 rings. There were two speeds- fast, and very fast. We burned through hardware store leather gloves after a few descents! Now, using better and safer rappelling devices we are able to control the speed a lot better.
While you can get by without gloves if you have the speed just right, It’s still nice to have the peace of mind of one extra level of friction before burning up your hands and falling out of control. Hardware store gloves really do work well. The fit isn’t as nice as belay gloves from Black Diamond or Petzl, but they do the job.
If you have the friction dialed right, you can just use rubber-palmed gardening gloves. They do a great job protecting your hands from the abrasive rock, and even give you extra grip when stemming or chimneying. Rubber-palmed gloves will get shredded if you rappel too fast with them though, so be careful.
13. Gather Beta Ahead of Time
Canyoneering is an off-the-grid adventure. There are a few guidebooks out there, but conditions change all the time. There’s a balance between unscripted adventure and safety that is different for each person. Some people like to know little more than the gps waypoint for the drop in, while others only do canyons with those who have done them before and are familiar with the route.
It’s also really nice to know how much water to expect in a canyon, and whether any potential keepers are full (read: how to escape a pothole ). The best online resource is probably Rope Wiki
 , which is a composite of lots of different beta sites. Take a look at the sources that were used, and review each of them for additional tips and conditions.
I like to review the maps and information provided by several key websites ahead of time and print out directions. From personal experience, print out two copies and keep one in the dry bag.
I can’t tell you how many times I’ve jumped in the first pothole only to realize that I left the paper map and instructions in my pocket! Make sure to have a digital copy downloaded on your phone as well.
14. Download Topographical Map on Google
Google’s location services will pretty much always work if you download the map on your phone beforehand. The default map is a hybrid that’s mainly for roads, so make sure you download the topographical map. The Google Maps topo has always been good enough for me to follow along with maps and see exactly where I’m at.
I’ve spent a lot of time in the past wandering around in the desert trying to figure out where we’re at based on poorly-written beta and a printout of a map. Even with a good topographical map it can be difficult to tell without a birdseye view which ridge or valley you are in. My dad uses the Gaia GPS app for his phone, and I’ve really enjoyed using Fat Map
 for its 3-D views of wilderness areas.
If you do plan to rely on a phone gps for primary navigation, I recommend bringing along a power bank to recharge it just in case. GPS can drain the battery pretty quickly.

15. Be Prepared
Accidents happen. A lot of the time canyoneering you’ll be way out in the middle of nowhere with no cell service and very little chance of coming across any other people. It’s important to have the gear and expertise necessary to get yourself out of the situation and self-rescue.
Bring an emergency kit including things like a (stocked and non-expired) first-aid kit, an emergency blanket, a headlamp, a fire starter, a knife, and a water purification method. I keep my emergency kit together inside a 10L dry bag in the bottom of my pack so that it always stays dry (and helps me float!). A successful trip is one where the dry bag emergency kit stays at the bottom of the bag!
Let someone know where you’re going, which route you intend to follow, and when they should hear back from you. I always send my dad this information, along with a specific time when he should call in the cavalry.
The specific call for help depends on the length and remoteness of the canyon, but is usually late at night or the next morning. To date, I’ve never had SAR called, though we have come close a couple of times.
For more information on emergency gear for Canyoneering, read our Recommended Gear Page – Emergency Kit.
16. Don’t Fall
This advice is sort of like when your mother or your spouse tells you to ‘drive safe.’ As if you weren’t going to drive safe unless they advised it! But really, don’t fall. If you are looking at a section and aren’t sure if you can downclimb it safely or not, don’t!
It’s easy to pull out a handline and rig a meat anchor and subsequent partner assist. There’s nothing macho about a twisted or broken ankle in the bottom of a canyon. This is especially prevalent in dangerous conditions like when there is ice or snow, or even running water.
Conclusion
Do you have any other tips for canyoneering that we don’t know about? Let us know so we can try them out!
